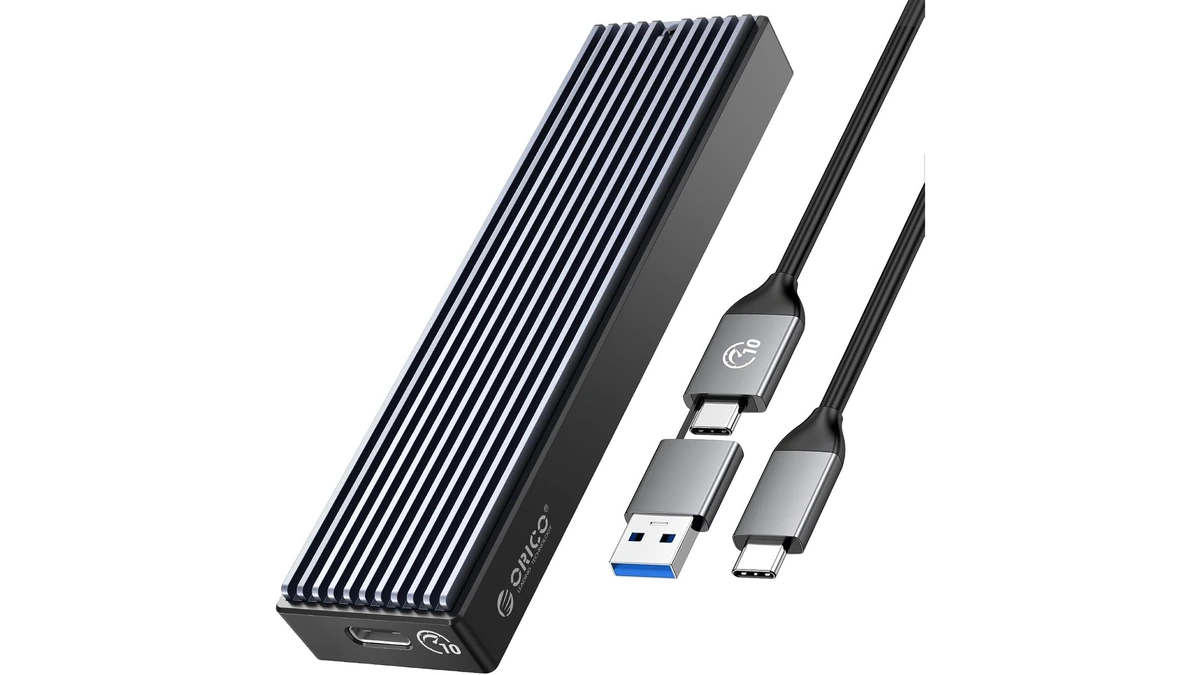
ORICO M.2 NVMe SSD Enclosure (10Gbps)
ORICO USB 3.1 Gen 2 (10Gbps) M.2 NVMe SSD enclosure supporting 2230/2242/2260/2280 form factors up to 8TB, with UASP support for fast external drive performance.
3 retailers


This tutorial takes about 9 minutes to complete.
Ventoy lets one USB or external drive hold many operating system ISOs. You install it to the drive once, then add or remove ISOs by copying files. This guide follows the video on Ubuntu 26.04 Desktop and ends by booting four ISOs from one drive.
Warning: Installing Ventoy erases everything on the drive you choose. Back up anything important first.
You need a computer running Ubuntu 26.04, a USB or external drive (the bigger the better, since all your ISOs go on it), admin and sudo rights, an internet connection to download Ventoy, and a couple of ISOs you want to boot. Back the drive up first: installing Ventoy erases it.
Jump to a chapter in the video: Intro · What you need · Download Ventoy · Install Ventoy · Add your ISOs · Boot test
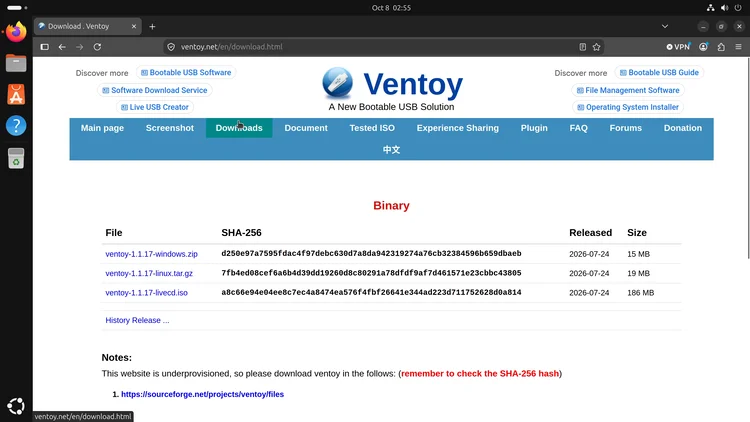
Open your browser, type https://ventoy.net in the search bar and press Enter. Go to Downloads, then click Downloads. Find and click ventoy-1.1.17-linux.tar.gz to start the download.
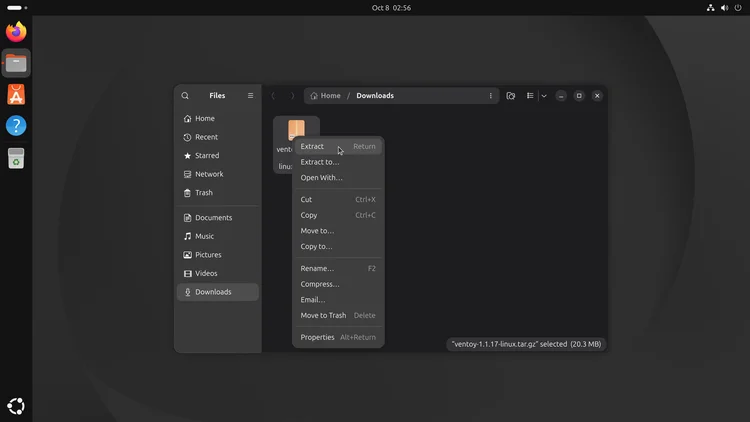
Once the download finishes, open the folder from the browser's download list and close the browser. Right-click ventoy-1.1.17-linux.tar.gz and click Extract. You can delete the tar.gz file afterwards.
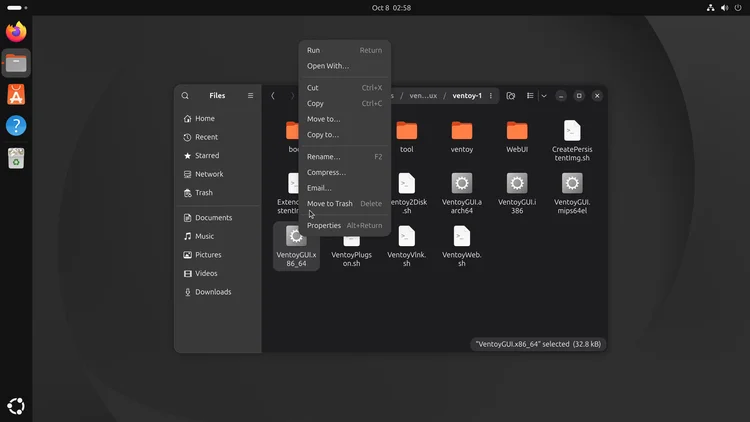
Double-click the extracted Ventoy folder. In the video, the machine is an x86_64 build (AMD or Intel), so right-click VentoyGUI.x86_64 and click Run. Type your password when it asks for sudo access.
Tip: The folder lands in Downloads by default. To keep it somewhere easy to reach, cut it and paste it into your home folder; it still runs from there.
When the Ventoy window opens, plug in your USB or external drive and select it in the device menu. If it is not listed, click the green refresh button. If it still does not show up, open Options and choose Show all devices.
Warning: Show all devices lists internal drives too. Pick only the external drive, and do not format your internal hard drive. This option is off by default for that reason.
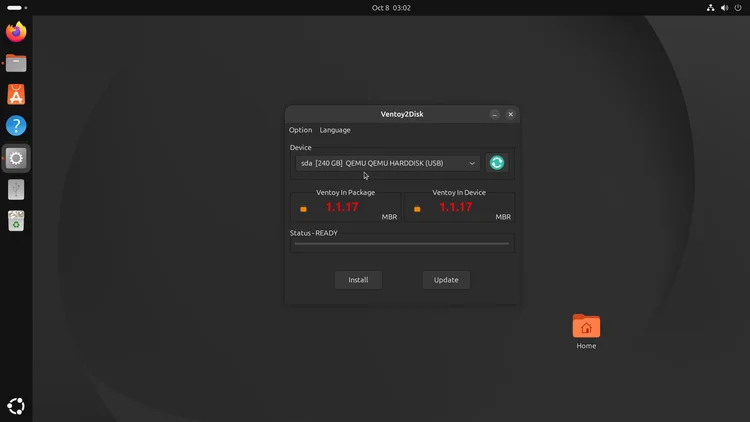
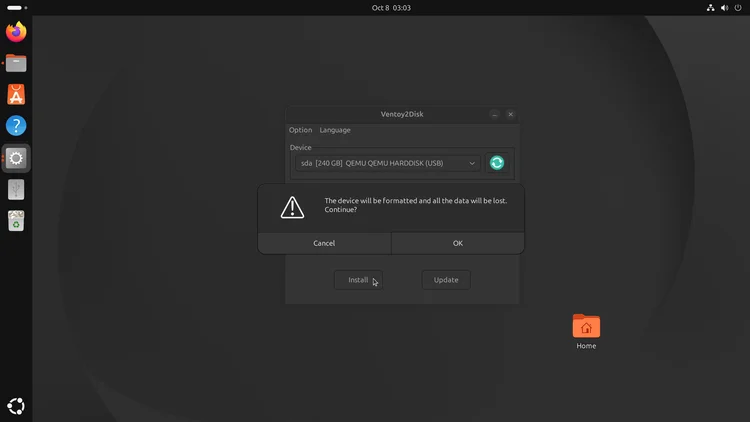
With your drive selected, click Install. A warning says the device will be formatted and all data will be lost; click OK. A second prompt asks you to double-check; click OK again. When Ventoy reports it was installed successfully, click OK and close Ventoy.
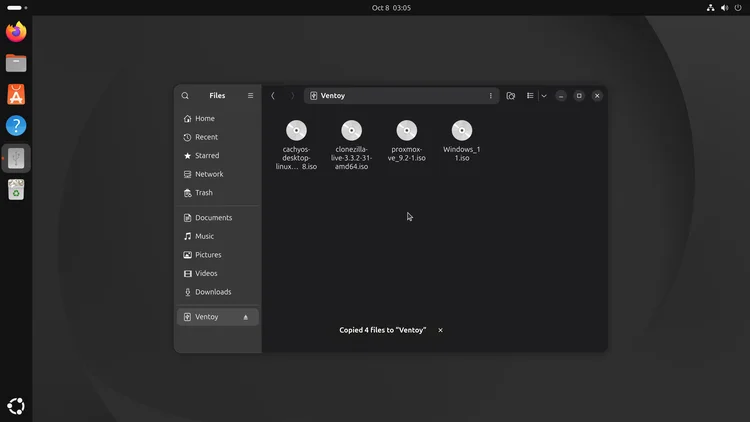
Open the Ventoy drive in your file manager. Copy the ISO files you downloaded (in the video they sit in a folder named OS) and paste them onto the Ventoy drive. Wait until the copy finishes. The video uses CachyOS, Clonezilla, Proxmox and Windows 11 ISOs.
Check your manufacturer's motherboard manual to find which key you need to press to get into the BIOS, where you can change the boot menu. Make sure the Ventoy drive (or whichever USB or hard drive you installed Ventoy to) shows up in the boot menu, then boot from it.
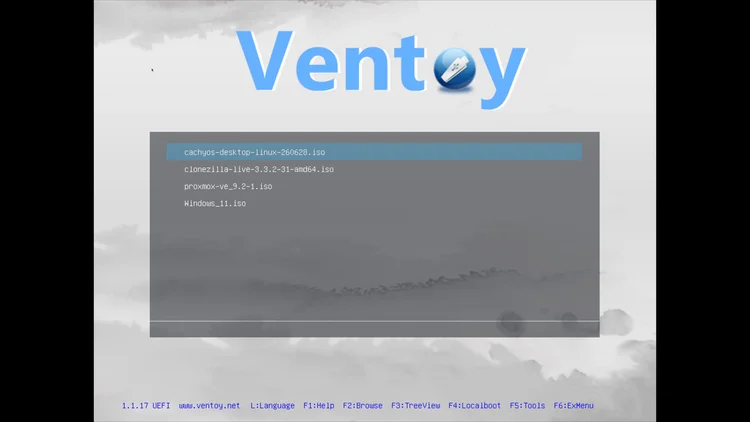
The Ventoy menu lists the ISOs you copied: CachyOS, Clonezilla, Proxmox and Windows 11 in the video. Select one and it boots; all four booted successfully. To try the next one, exit out and boot again from the Ventoy menu.
One email a week on local LLMs, DIY AI hardware, and the tools that power them. No spam — unsubscribe anytime.
Subscribe freeORICO USB 3.1 Gen 2 (10Gbps) M.2 NVMe SSD enclosure supporting 2230/2242/2260/2280 form factors up to 8TB, with UASP support for fast external drive performance.